Integrating Zapier with Rules
Each Falkonry Rule produces three types of output signals - Alert,
Rule output and Explanation. Alert signal contains all the alerts
generated by the rule. Rule output signal contains the results of the
rule each time the rule gets evaluated. And Explanation signal
contains the evaluation result for each signal as the rule evaluates it.
The signal values for each of the three Falkonry generated signals is
either true or false.
Here is the step-wise example on how to integrate Falkonry Rules with Zapier for sending alerts via email:
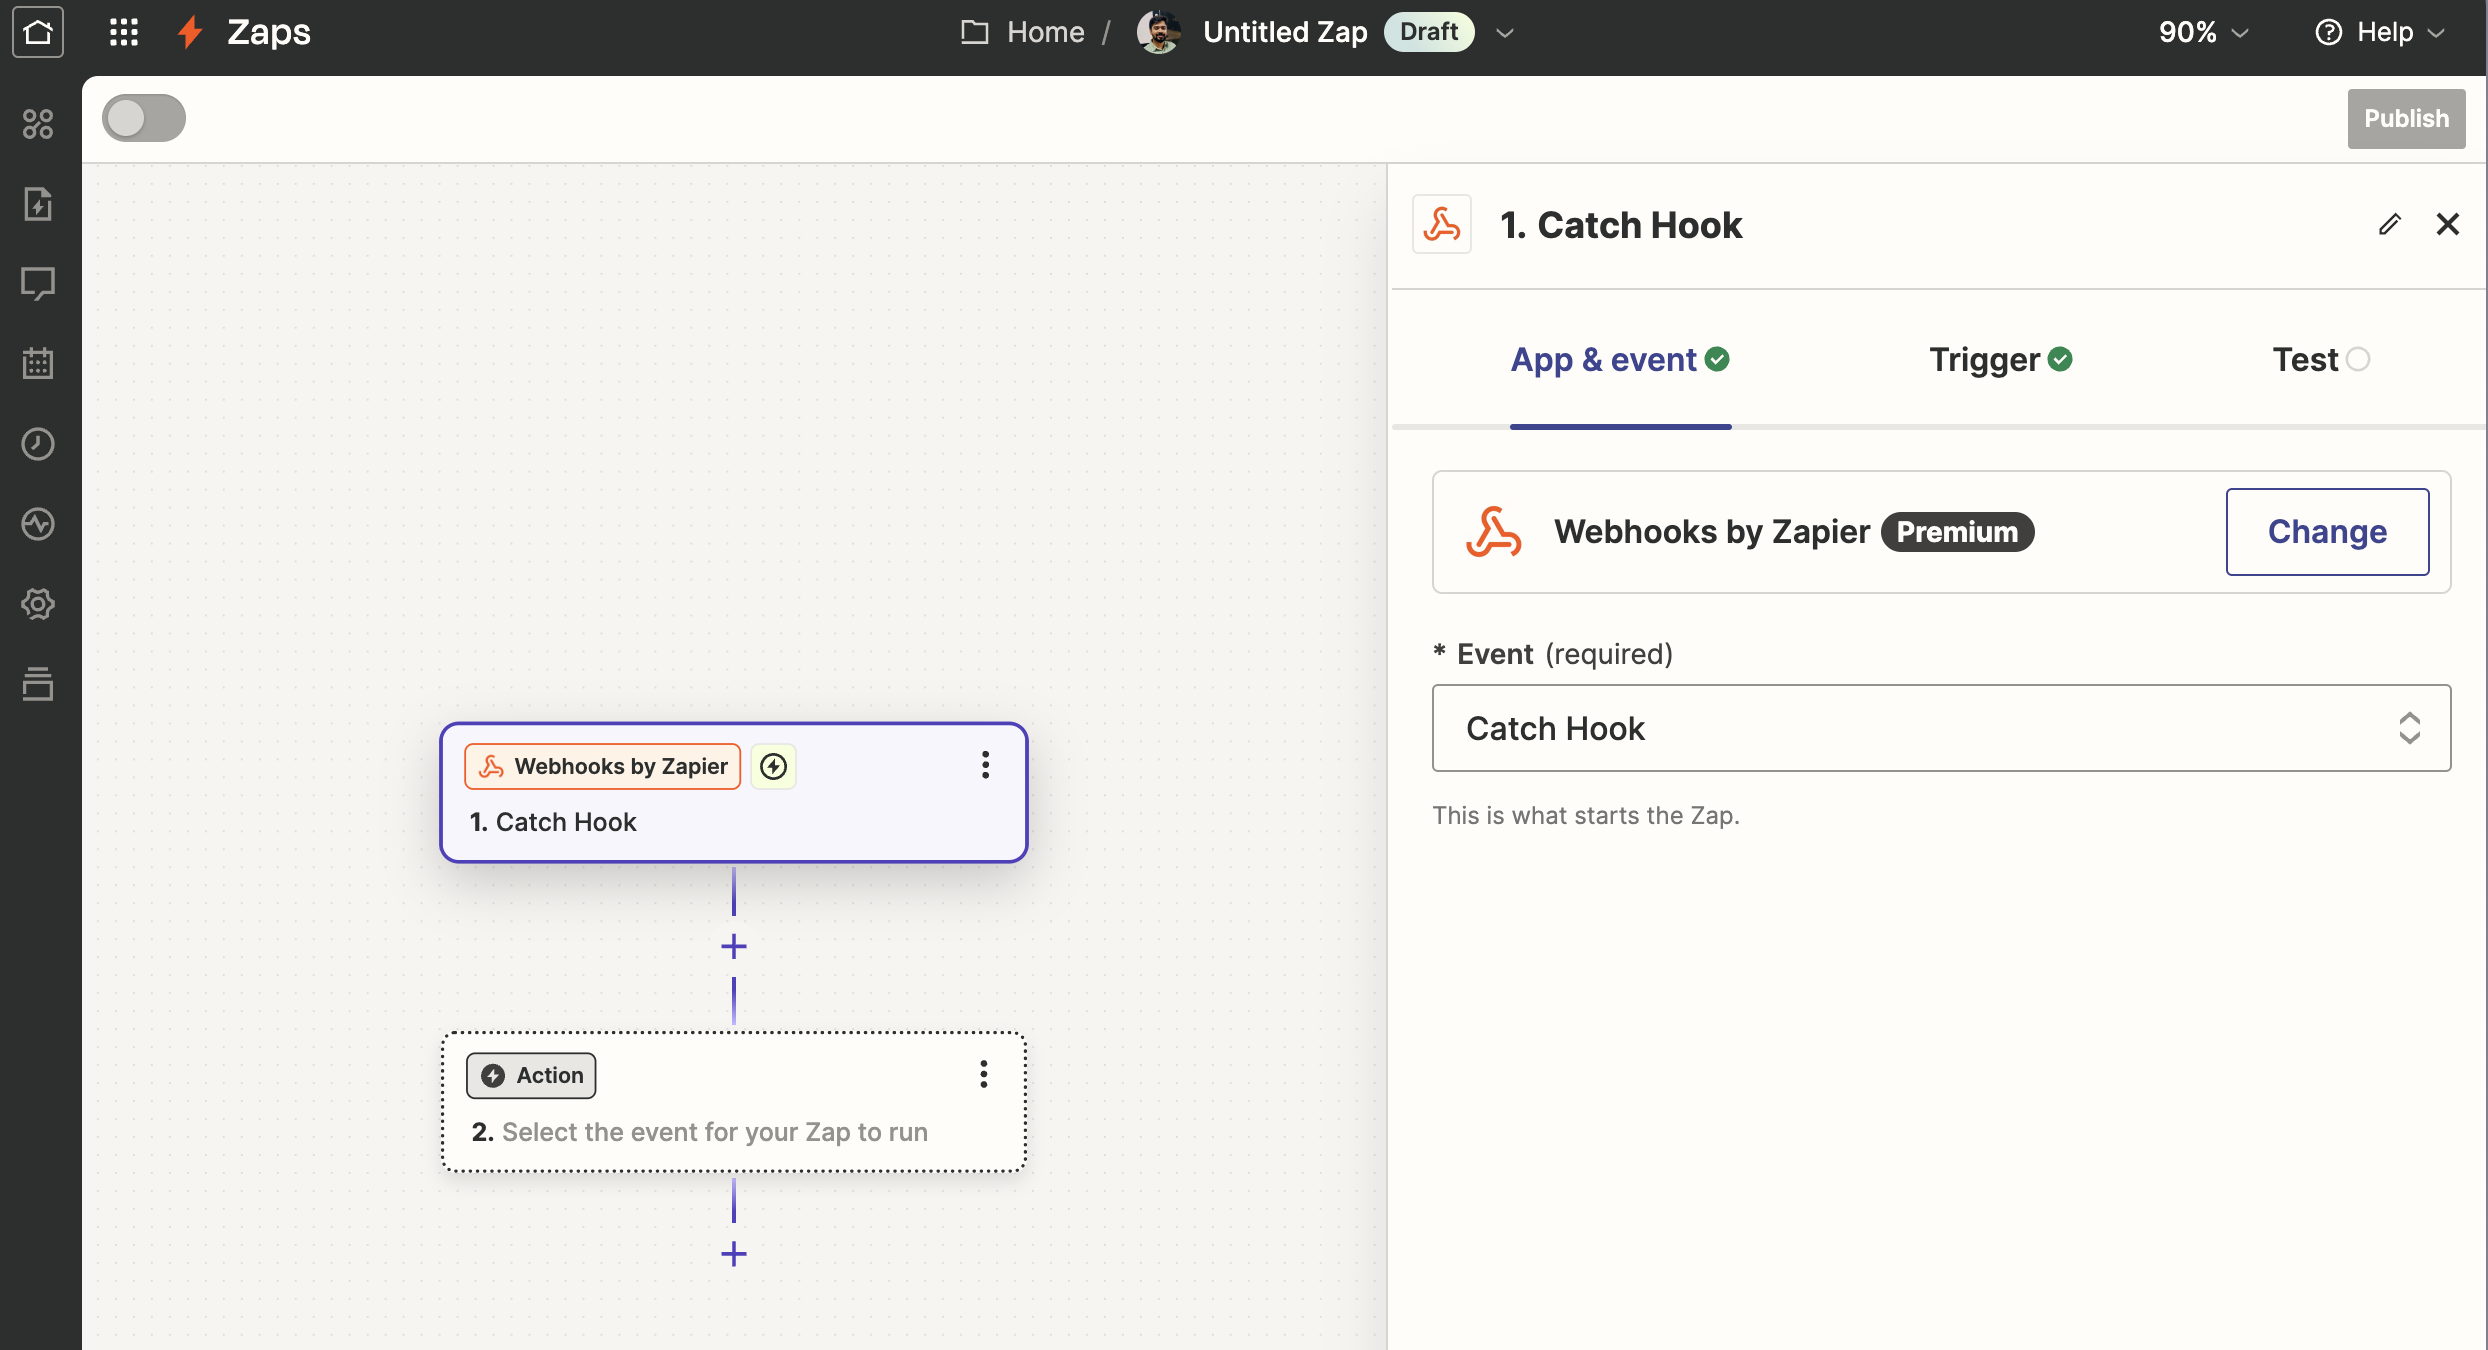
Step 1: Log in to Zapier and create a Zap (workflow)
Go to My Zaps and create a Zap with trigger as Webhooks by Zapier and select event as Catch Hook. Go to the Test page and copy the webhook URL.
Step 2: Create an Outbound Connection in Falkonry
Go to Administration > Connections section in your Falkonry account, and create an Outbound Connection of type Zapier. For this connection, you are required to provide the webhook URL from the Zap created in the Step 1.
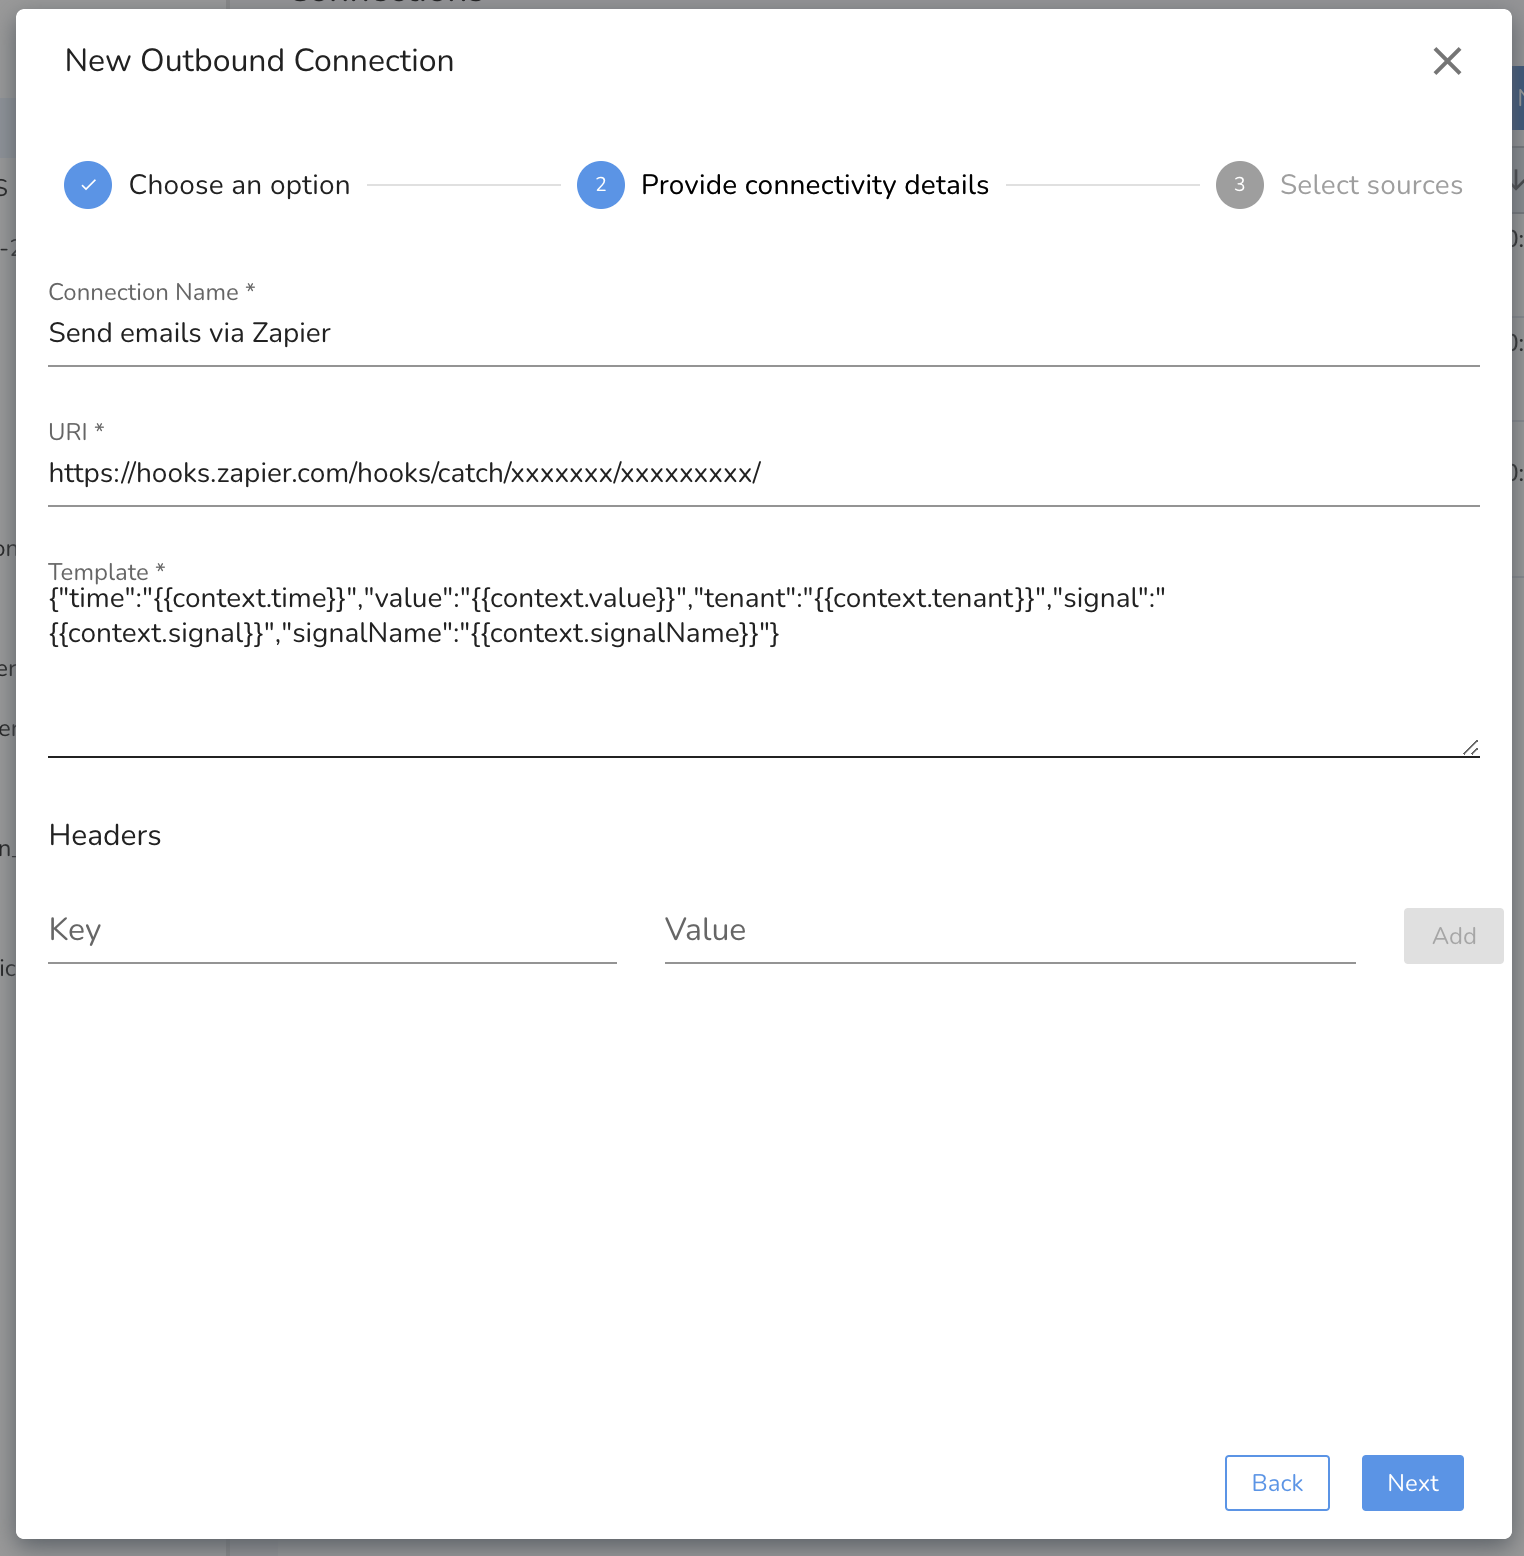
Step 3: Contextualize the alert by editing the template
While creating the connection in Falkonry, you can edit the Template.
This template is the format of the webhook payload that Zapier will
receive. To see what additional properties are available to use in the
template, refer here <setting-outbound-connection>{.interpreted-text
role="ref"}.
For this example let\'s use following template:
{
  "time": "{{context.time}}",
  "value": "{{context.value}}",
  "tenant": "{{context.tenant}}",
  "rule": "{{context.rule}}",
  "rule_name": "{{context.ruleName}}",
  "description": {{context.ruleDescription | tojson}}
}
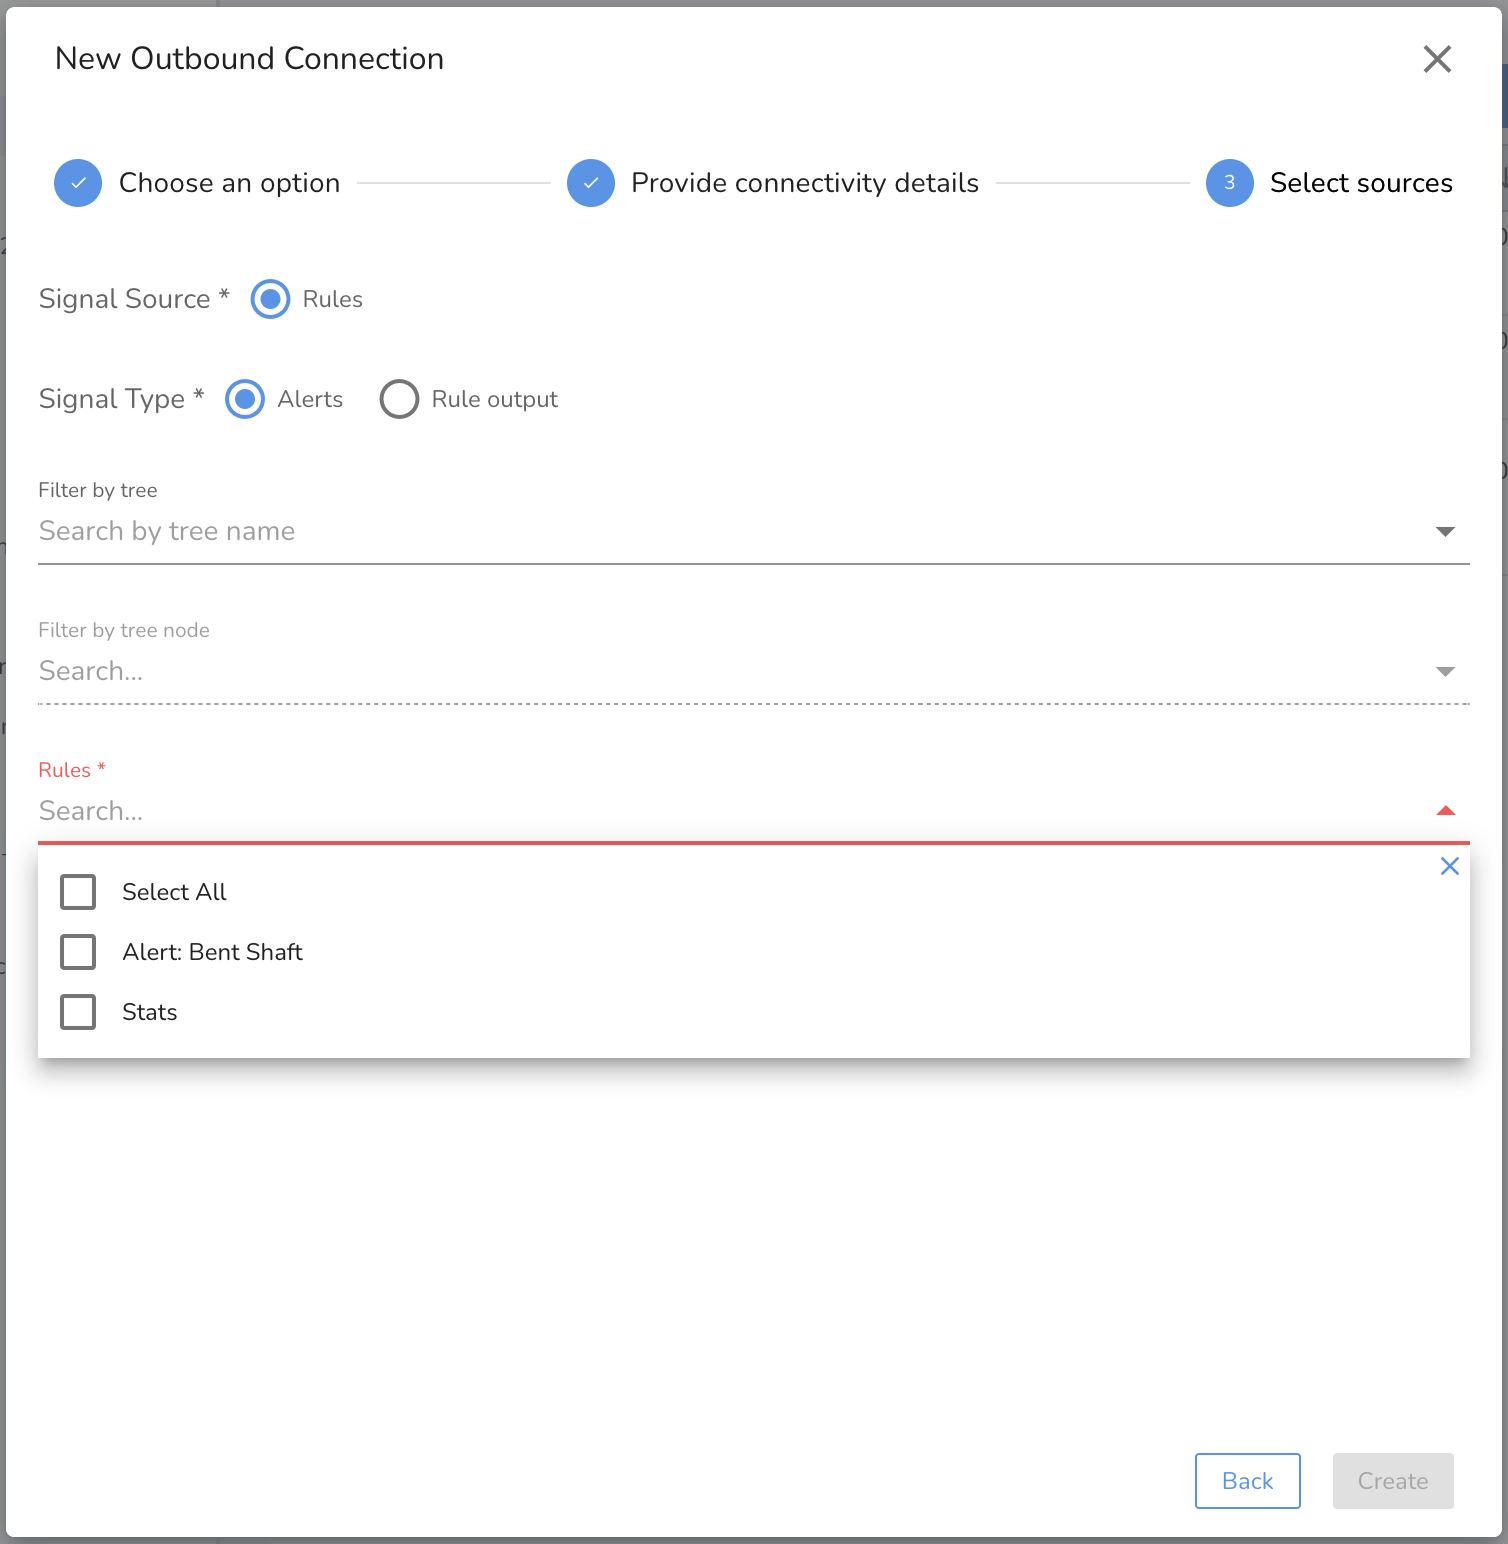
Step 4: Select the Falkonry Rules to receive alerts
In the next step of creating a connection in Falkonry, select the Falkonry Rules to send alerts to Zapier.
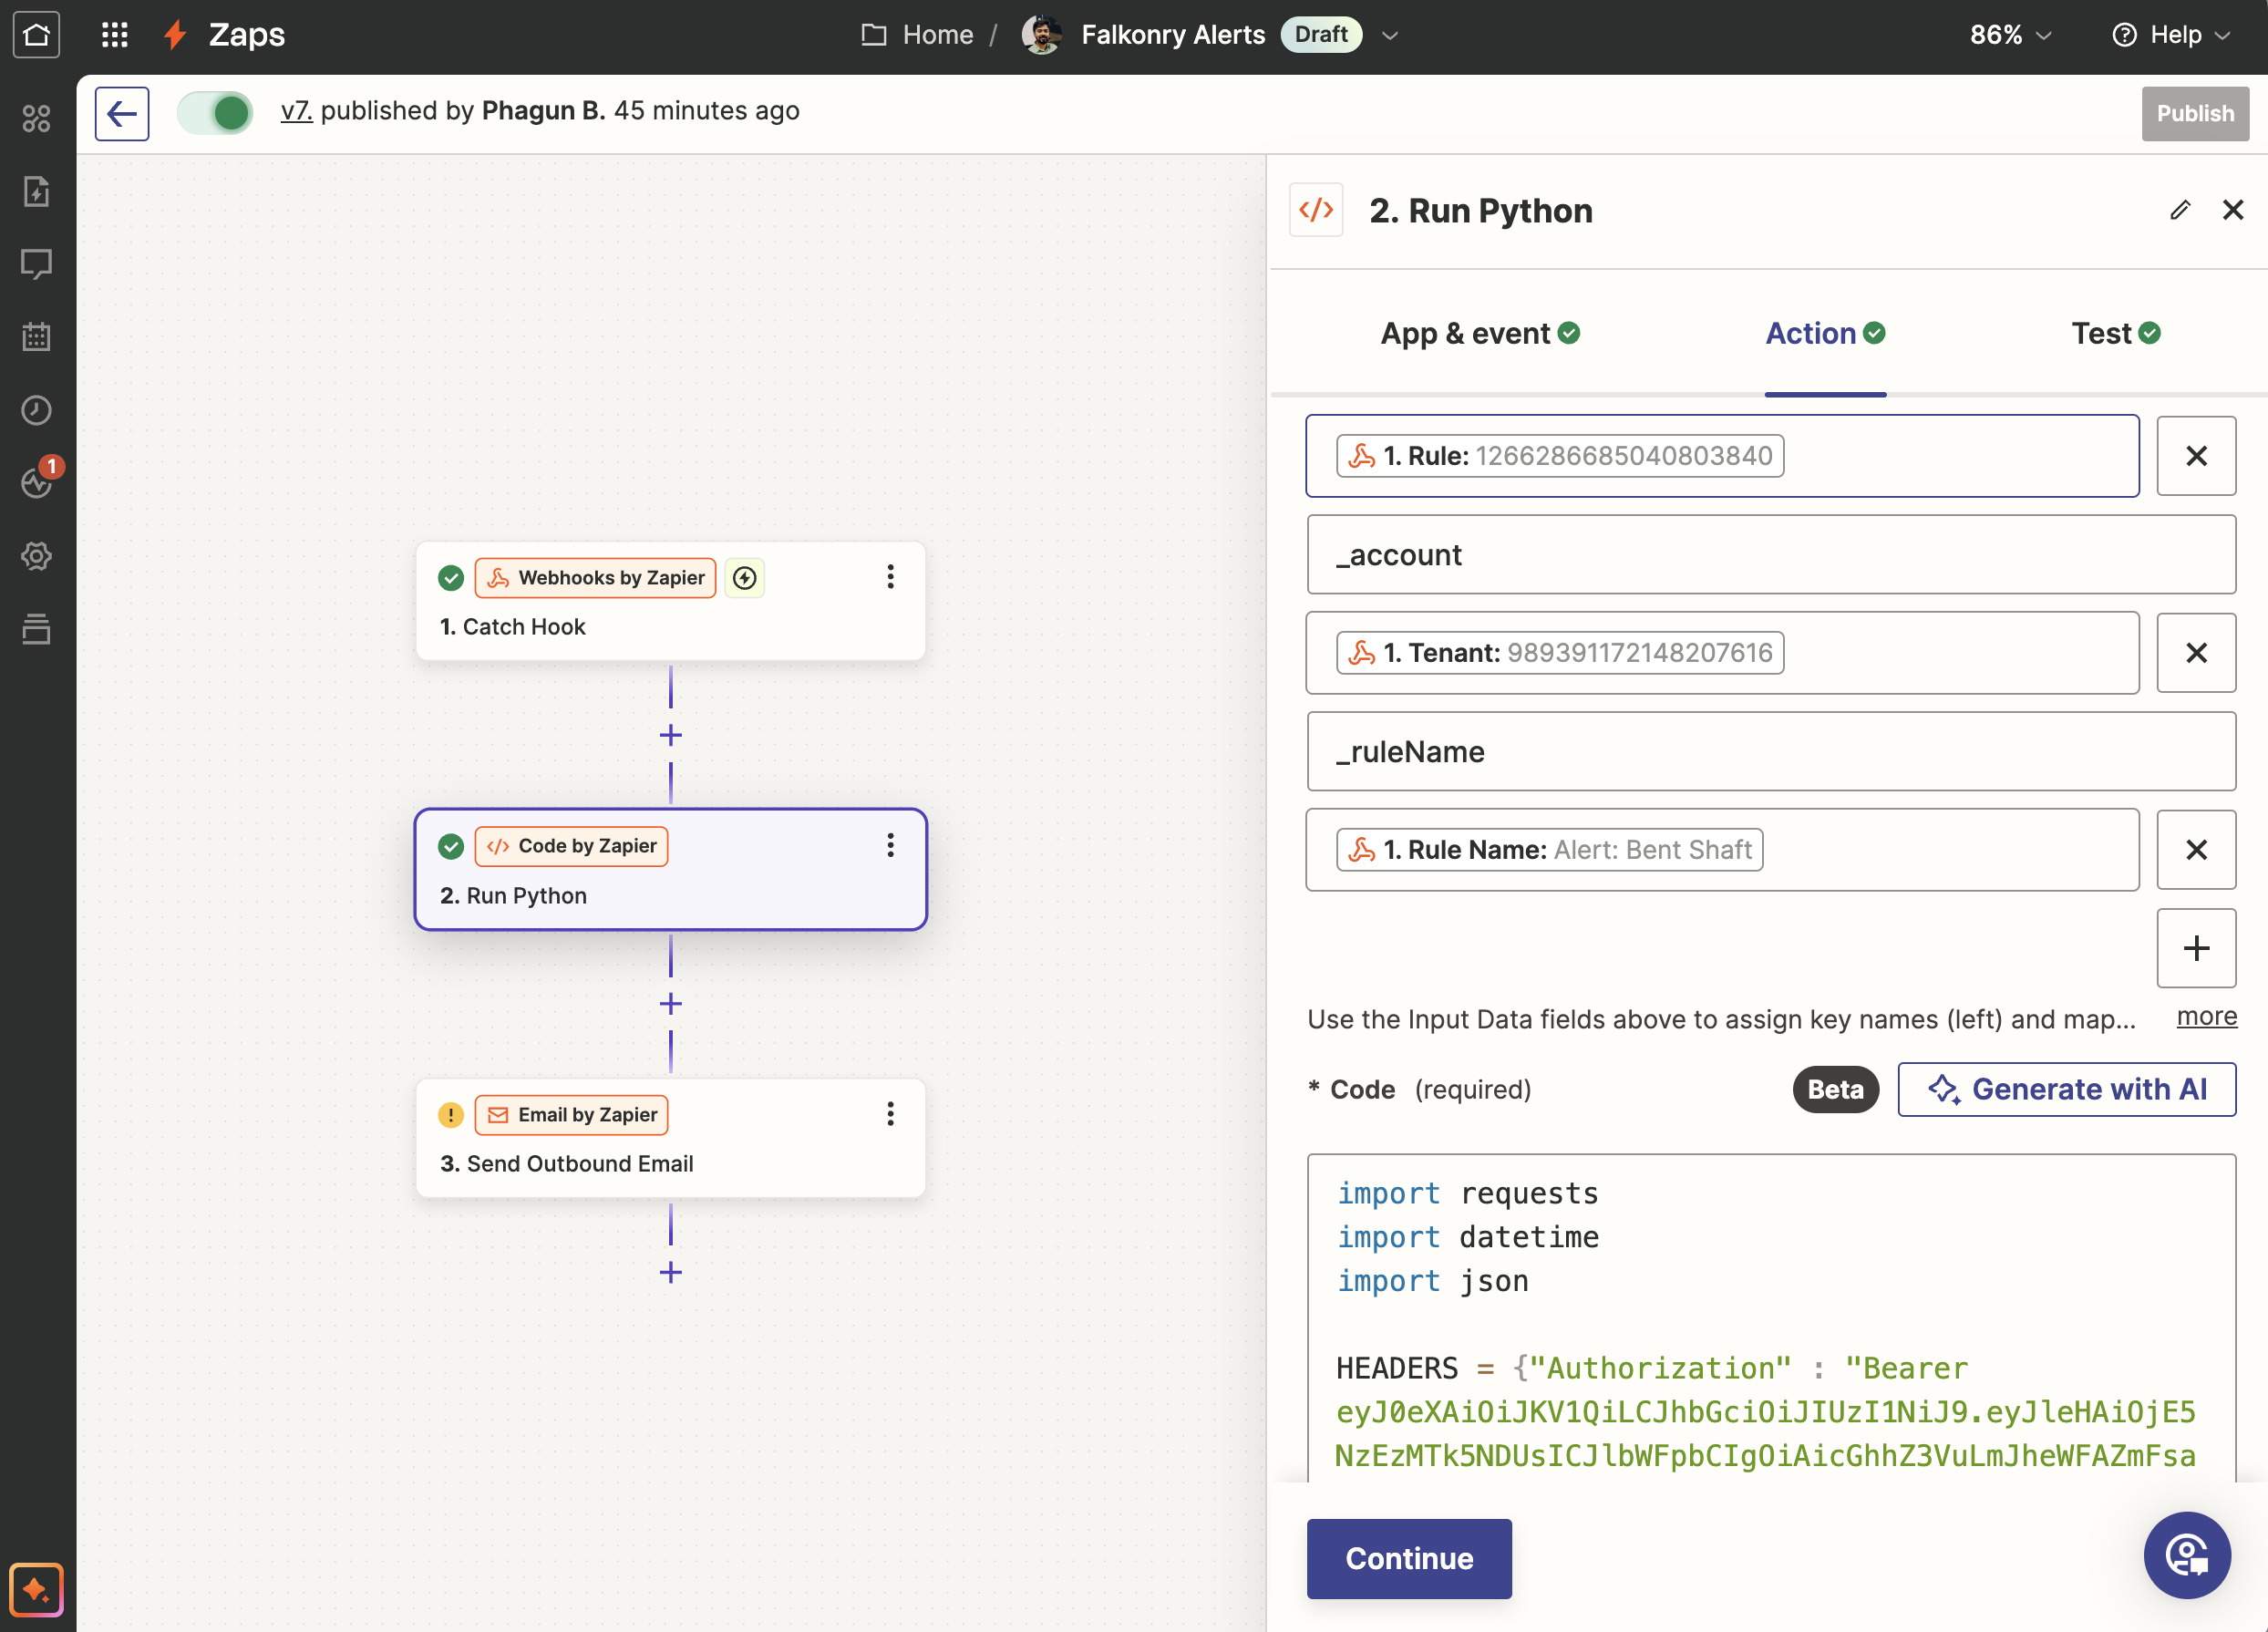
Step 5: Configure the workflow in Zapier to send email
Go to Zapier and start editing your Zap. You can add a step to call Falkonry API and get the tree information associated as well as which signals caused the alert.
Following is sample Python code to get contextual information:
import requests
import asyncio
import datetime
import json
from dateutil import tz
from requests.adapters import HTTPAdapter
from requests.packages.urllib3.util.retry import Retry

https_req = requests.Session()
retries = Retry(total=3, backoff_factor=0.5, status_forcelist=[429, 500, 502, 503, 504])
https_req.mount('https://', HTTPAdapter(max_retries=retries))

FALKONRY_URL = "https://<falkonry-app-url>"
TOKEN        = "<paste-falkonry-api-token>"
HEADERS      = {"Authorization" : f"Bearer {TOKEN}", "Accept": "application/json"}

TIME         = input_data['_time']
ACCOUNT      = input_data['_account']
RULE         = input_data['_rule']
RULE_NAME    = input_data['_ruleName']

UI_START_TIME = datetime.datetime.fromtimestamp(datetime.datetime.strptime(TIME, "%Y-%m-%dT%H:%M:%SZ").timestamp() - 60*60.0, tz=None).isoformat() + 'Z'
UI_END_TIME = datetime.datetime.fromtimestamp(datetime.datetime.strptime(TIME, "%Y-%m-%dT%H:%M:%SZ").timestamp() + 30*60.0, tz=None).isoformat() + 'Z'

# change timezone since the alert time is in GMT
# in this example we are changing the timezone to America/Los_Angeles
ALERT_TIME = datetime.datetime.strptime(TIME, "%Y-%m-%dT%H:%M:%S%z").astimezone(tz.gettz('America/Los_Angeles')).strftime("%Y-%m-%d %H:%M:%S")

def get_explanation_data():
    url = f"{FALKONRY_URL}/api/1.2/data/accounts/{ACCOUNT}/assessments/{RULE}/explain?time={TIME}"
    r = https_req.get(url, headers=HEADERS)
    return r

def get_rule():
    url = f"{FALKONRY_URL}/api/1.2/accounts/{ACCOUNT}/assessments/{RULE}"
    r = https_req.get(url, headers=HEADERS)
    return r

async def main():

    # Getting rule and explanation information
    loop = asyncio.get_event_loop()
    future1 = loop.run_in_executor(None, get_rule)
    future2 = loop.run_in_executor(None, get_explanation_data)

    response1, response2 = await asyncio.gather(future1, future2)

    rule = response1.json()
    explanation_signal = response2.json()

    # Extracting the layout node information from the JSON data
    if "layoutinfo" in rule:
        layout = next((l for l in rule['layoutinfo'] if "sourceNode" in l), {})
    else:
        layout = {
          "layoutname": "None",
          "layout": "dummyId",
          "layoutnode": "dummyId"
        }

    # Getting relating signals that caused the alert
    related_signals = []
    if len(explanation_signal) > 0 and 'contributingSignals' in explanation_signal[0]:
        for c in explanation_signal[0]['contributingSignals']:
            related_signals.append(c['name'])

    # Storing the information in a dictionary for the next step
    return {
        "alert_time": ALERT_TIME,
        "rule_link": f"{FALKONRY_URL}/accounts/{ACCOUNT}/layouts/{layout['layout']}/layoutNodes/{layout['layoutnode']}/rules/{RULE}?start_time={UI_START_TIME}&end_time={UI_END_TIME}",
        "layout_name": layout['layoutname'],
        "node_path": layout['materializedPath'],
        "related_signals": ',\n'.join(related_signals)
    }

output = asyncio.run(main())
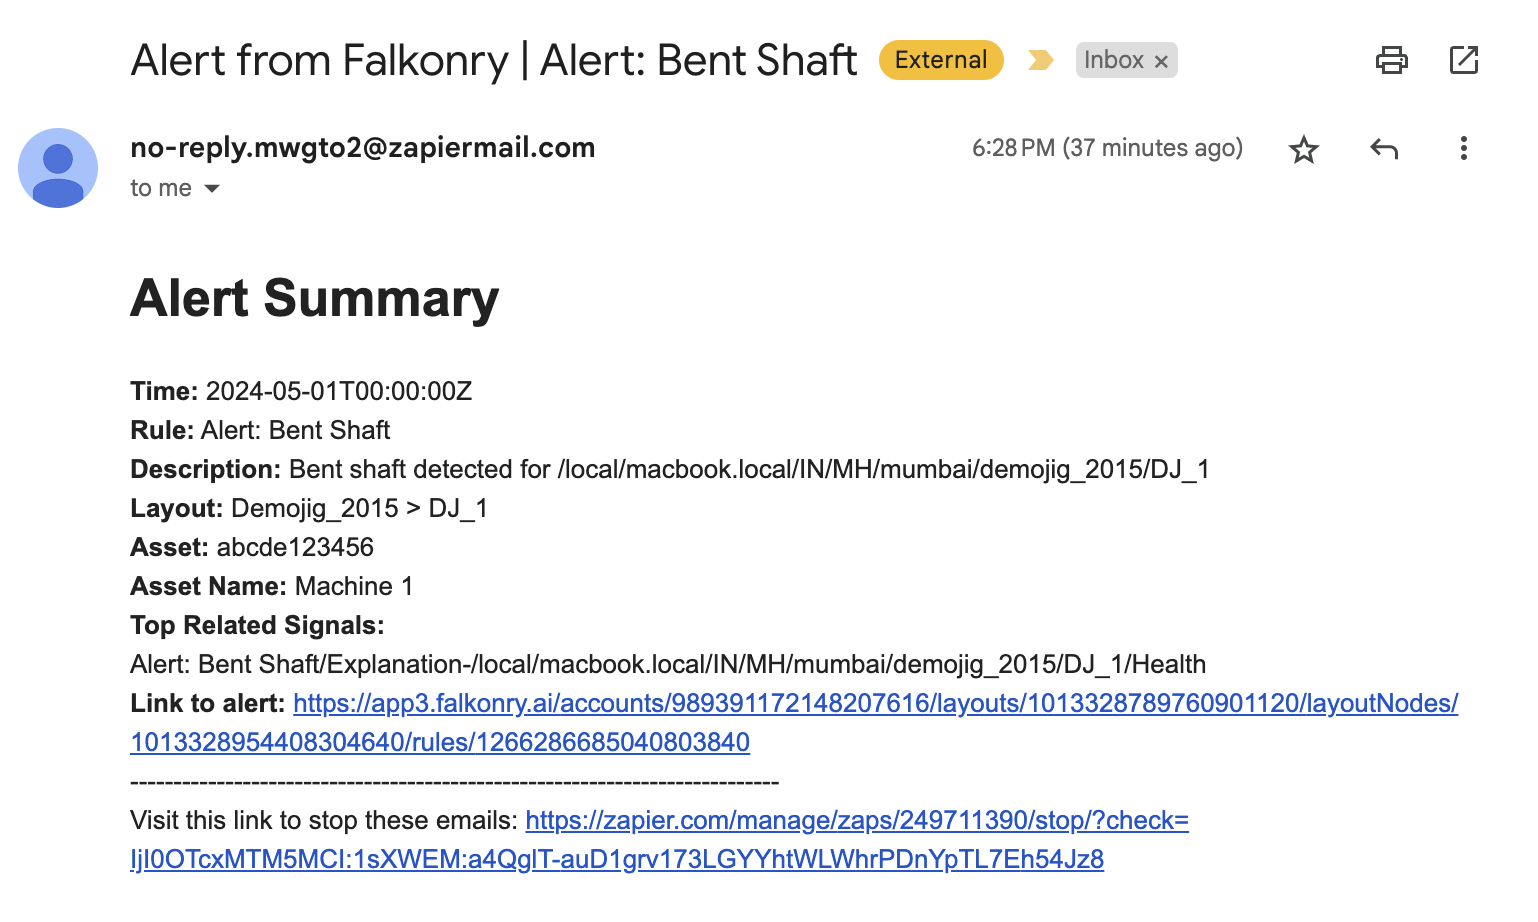
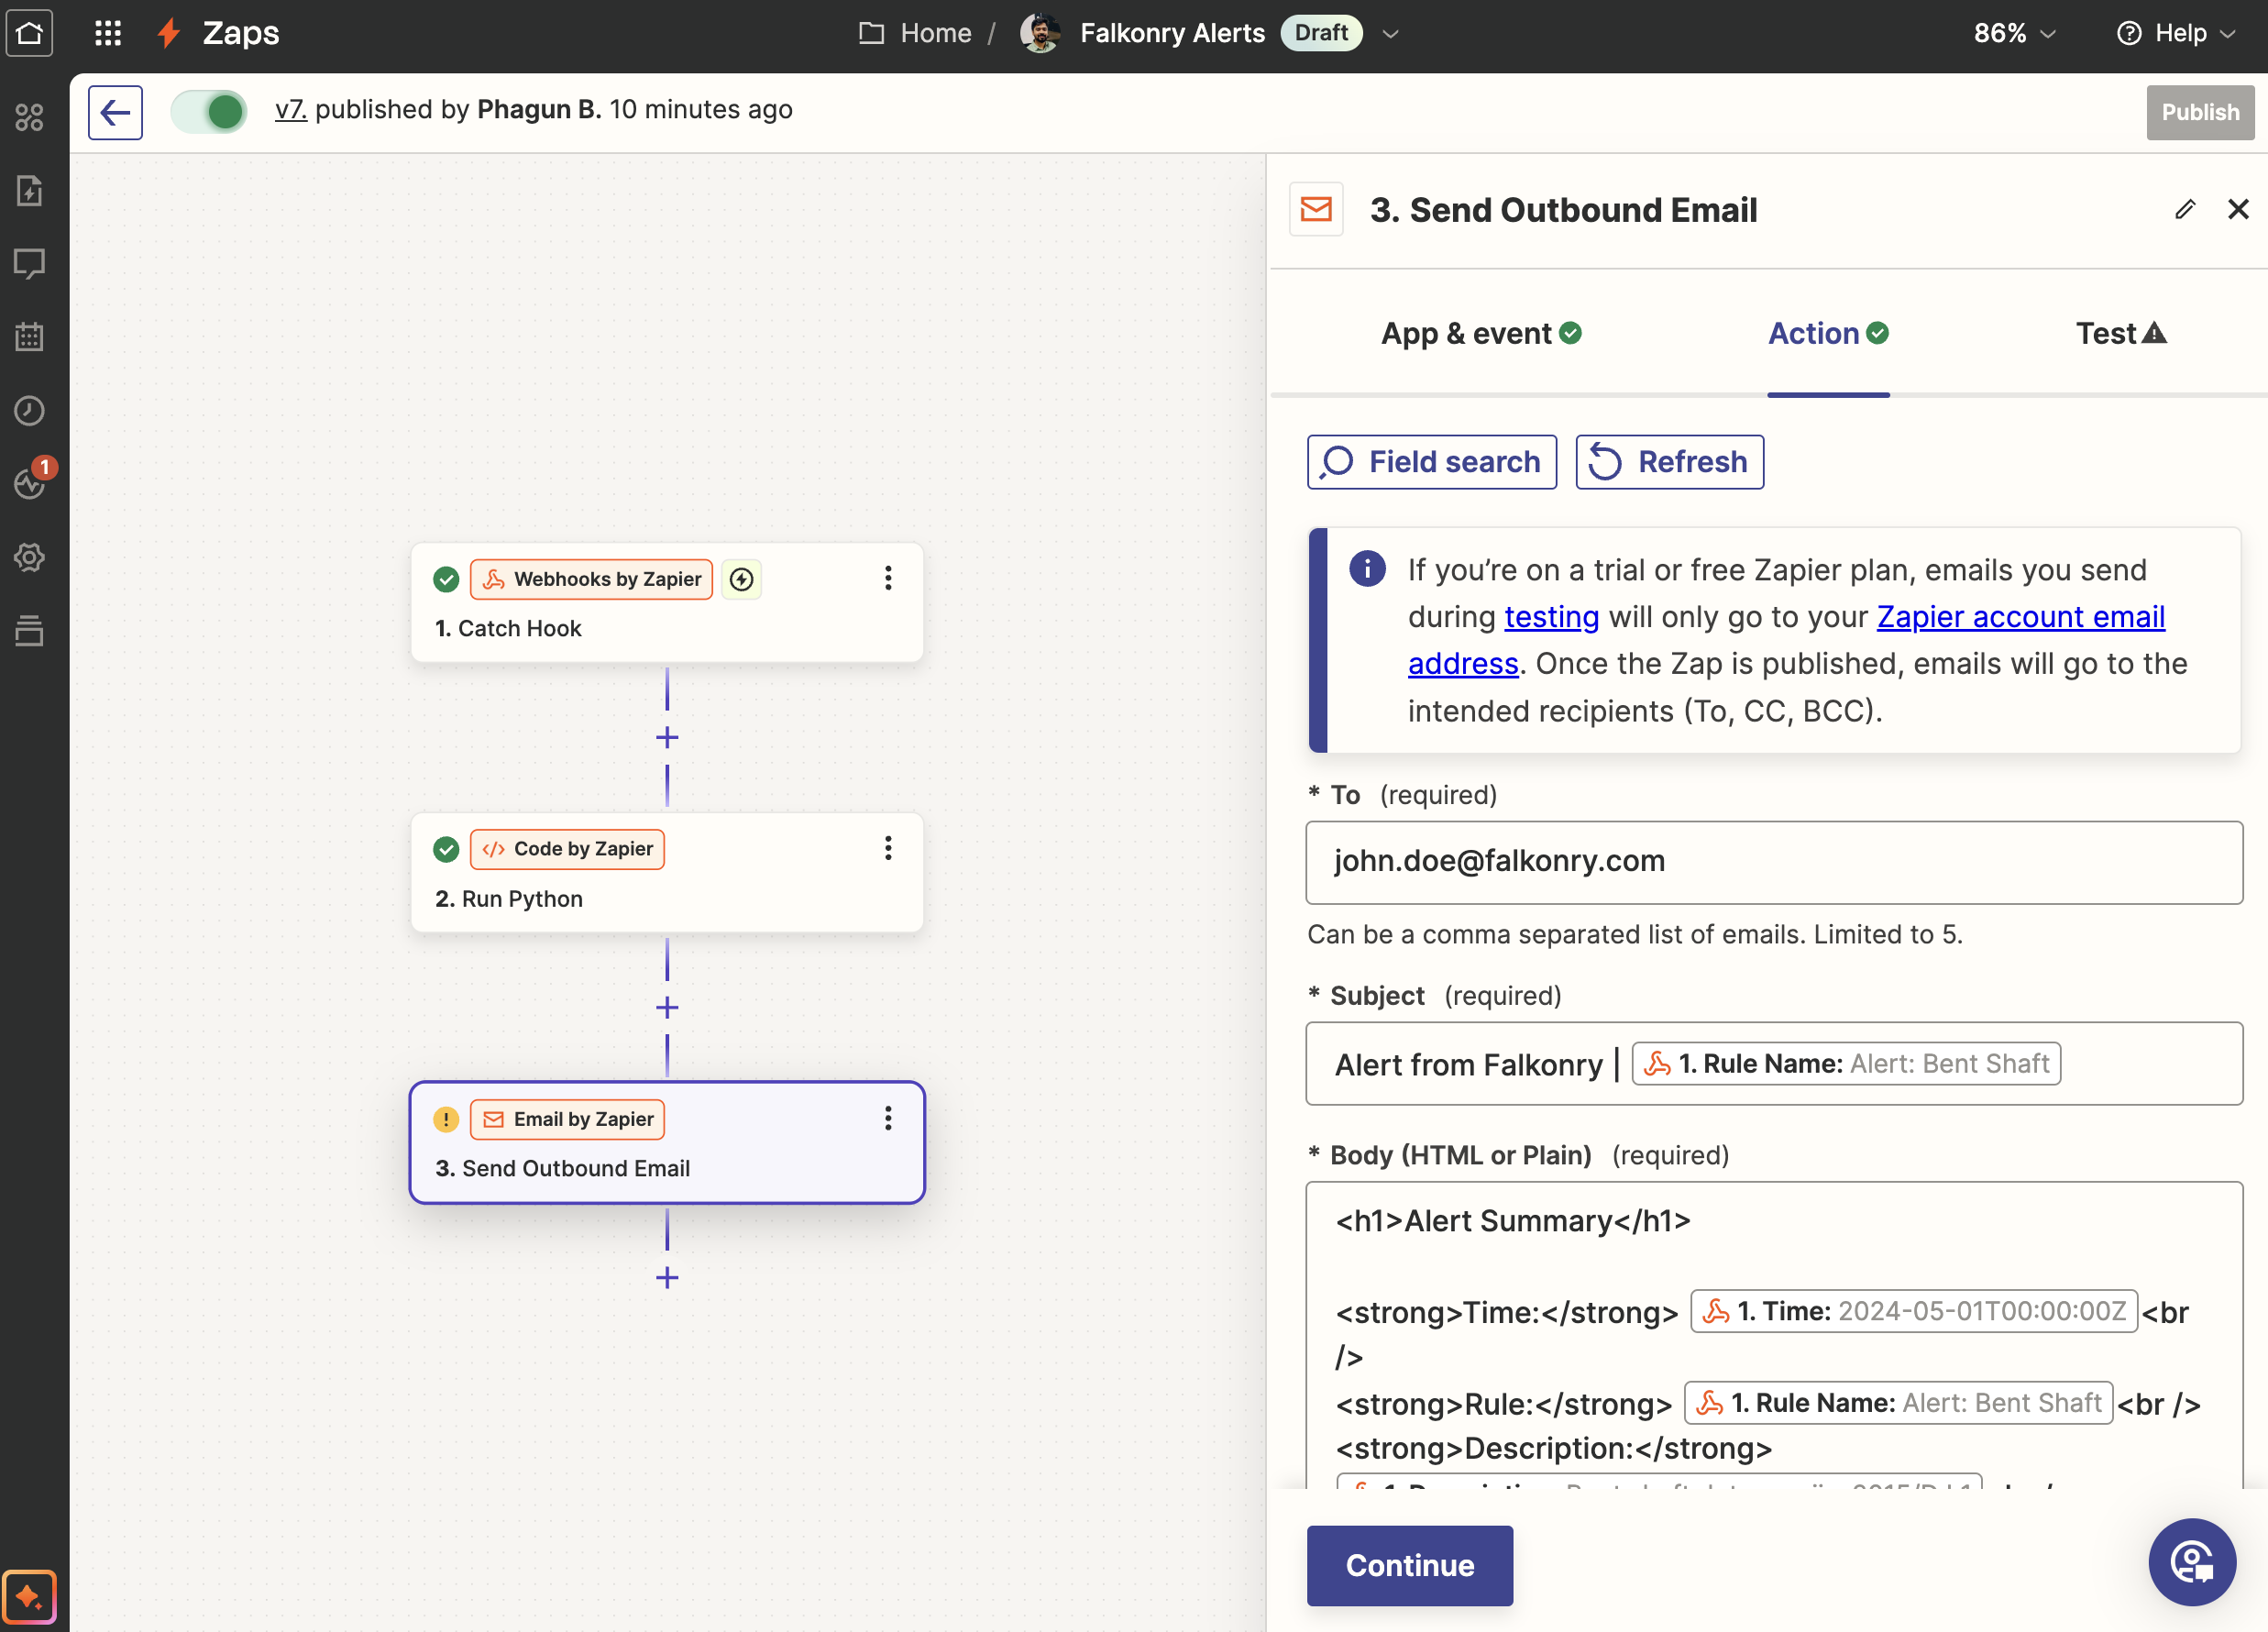
After testing the code, the next step in this workflow is to send email with all the relevant information. You can customize the email template in the format that\'s desirable to you and your team.
Step 6: Publish the Zap
After setting up the email configuration, publish the Zap to make it live. From now one, for each alert in Falkonry, you should expect an email to all the configured users. The email will get sent out from Zapier (@zapiermail.com), make sure to check your spam folder.